Why Canvas Painting Is the Perfect Hobby
Canvas painting has this unique magic—it instantly makes even beginner art look polished. Unlike paper, canvas holds color, texture, and detail beautifully. That’s why it’s a favorite for both hobbyists and professionals. The good news? You don’t need an art degree to create something gorgeous. With the right canvas painting supplies, a bit of acrylic paint, and some creativity, you can start today.
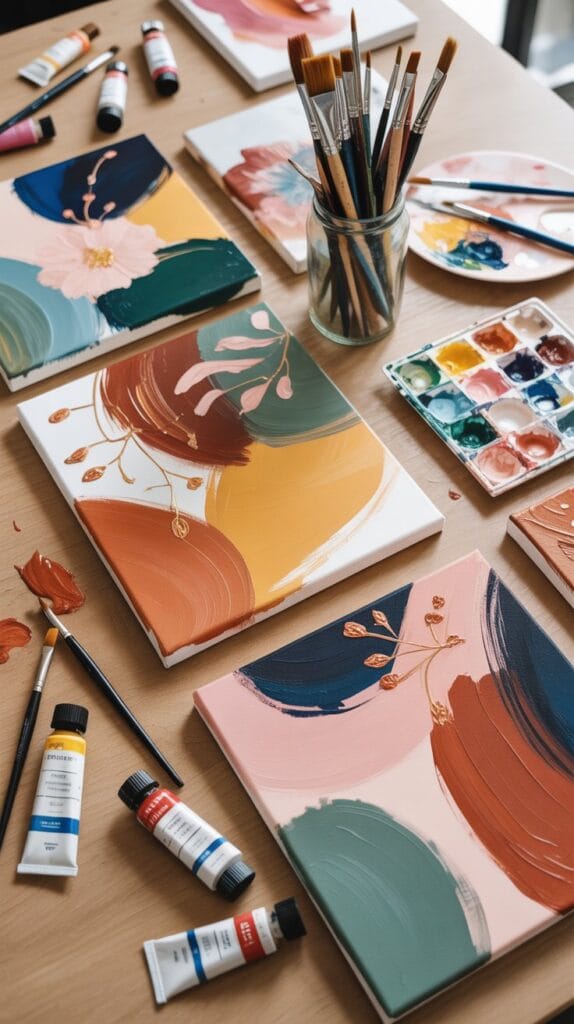
Best Supplies for Canvas Painting (Beginner to Pro)
Before diving into ideas, let’s talk about what actually makes your paintings look professional. Canvases: start with stretched cotton canvas or affordable canvas boards. Look for multipacks online—they’re budget-friendly. Paints: acrylic paints are the easiest for beginners. Oils are richer but take longer to dry. Gouache is a trendy option for matte finishes. Brushes: flat brushes for bold strokes, round brushes for details, and fan brushes for textures. Synthetic brushes are great with acrylics. Extras: painter’s tape for geometric art, palette knives for texture, and pouring medium for fluid art. Pro Tip: If you’re shopping online, search for “acrylic painting kits” or “canvas painting starter sets.” They often come with paints, brushes, and multiple canvases at a lower price.
21 Canvas Painting Projects
1) Minimalist Shapes
Paint simple circles, squares, or arches in muted tones. Perfect for a Scandinavian-inspired vibe.
Step by Step: Sketch shapes lightly. Fill with acrylics in layers. Keep edges clean for a designer look.
2) Sunset Silhouette
Nothing beats the drama of a glowing sky behind a crisp black silhouette. It reads modern from far away and poetic up close—perfect for bedrooms, hallways, or a statement over a desk.
Materials: Warm acrylics (cadmium yellow, cadmium orange, quinacridone magenta, alizarin crimson), titanium white, mars black, 1–2 soft flat brushes (1″ and ½″), round detail brush, blending mop, painter’s tape (optional).
Step by step:
Silhouette: When fully dry, sketch a tree, skyline, or flying birds. Fill with mars black using the round brush. Keep edges clean and intentional—silhouettes rely on crisp shape.
Pro tips: If blending scares you, add a few drops of acrylic glazing medium to each color; it slows drying and makes smooth gradients easier. For extra depth, glaze a second, translucent band of magenta where the sky meets orange.
Underpaint: Tone the canvas with a thin wash of yellow + water. Let it set for 2–3 minutes; it should be damp, not dripping.
Gradient: Working quickly while wet, lay horizontal bands—yellow at the bottom, then orange, then magenta, then a touch of crimson at the top. Feather the edges where colors meet with a clean, slightly damp brush. If you get harsh lines, mist lightly with a spray bottle from arm’s length and blend again.
Glow: Pull a whisper of white across the “sun” area (low horizon), then glaze a hint of yellow over it to make it radiate.
3) Abstract Brushstrokes
This is big energy without rules—great for loosening up and learning color harmony.
Materials: A limited palette (pick 3–4 hues + white), heavy body acrylics, 2–3 large flats, 1 palette knife, rag.
Step by step:
- Palette plan: Choose one dominant color, one supporting color, one accent, plus white. Pre-mix 3 tints (color + white) so you have light, mid, dark.
- Ground: Scumble a very light tint over the whole canvas so no stark white peeks through.
- Movement: Lay confident, varied strokes with a large flat—some long, some short, some overlapping. Keep edges crisp in places and soft in others by wiping the brush between passes.
- Rhythm: Introduce the accent color sparingly where the eye needs a spark (rule of thirds intersections work well).
- Knife work: Pull a few palette-knife swipes to add texture and catch light.
Pro tips: Stop before everything turns to “mud.” If colors start overmixing, dry with a hair dryer between layers.
4) Galaxy Canvas
Always trending for bedrooms and dorms; dramatic yet approachable.
Materials: Black gesso or paint, ultramarine blue, phthalo blue, dioxazine purple, magenta, titanium white, sea sponge or paper towel, old toothbrush.
Step by step:
- Base: Paint the canvas black. Let dry.
- Nebula: With a damp sponge, dab purple and blue clouds, leaving some black voids. Add magenta softly to warm certain areas.
- Depth: Glaze a thin blue over parts of the purple to push some “behind” others.
- Stars: Thin white with water. Load a toothbrush and flick stars. Add a few larger stars by tapping with the tip of a round brush.
Pro tips: Drop a subtle white haze around a cluster of larger stars to suggest distant galaxies. Keep some areas nearly pure black for contrast.
5) Quote Art
Turn your wall into motivation without looking “crafty.”
Materials: Two background colors for a gradient, metallic acrylic (gold or champagne), masking tape or stencil (optional), pencil, chalk, paint pen or small liner brush.
Step by step:
- Gradient: Blend your two colors diagonally or top-to-bottom. Let it dry smooth.
- Layout: Lightly pencil guidelines. Test lettering on paper first.
- Lettering: Use a paint pen or carefully hand-letter with a liner brush in metallic. Keep strokes consistent; thicken downstrokes for a calligraphic feel.
- Finish: Add a faint drop shadow with a darker tone to make the words pop.
Pro tips: If hand-lettering worries you, print your quote, rub chalk on the back, trace on canvas to transfer, then paint over the chalk guide.
6) Floral Corners
Romantic without overwhelming the room; it frames negative space beautifully.
Materials: Neutral background mix, a floral palette (payne’s gray, sap green, hooker’s green, alizarin, quinacridone rose, cad yellow, white), round brushes sizes 2–8, liner brush.
Step by step:
- Background: Paint a soft neutral (warm gray, greige, or blush).
- Placement: Lightly sketch clusters in two opposite corners.
- Leaves first: Block in leaves in two greens; add a darker shadow side.
- Blooms: Build roses and peonies from loose circles of mid-tone, then add shadow petals, finally highlights with lighter tints.
- Details: Veins with a liner brush, tiny berries, a few loose petals drifting inward.
Pro tips: Keep the center of the canvas mostly empty—negative space makes the corners feel intentional and modern.
7) Ocean Waves
Calming and meditative; a bestseller look.
Materials: Phthalo blue (green shade), ultramarine, teal, neutral gray, white, large flat, fan brush, stiff bristle brush.
Step by step:
- Horizon: Tape a straight horizon a third from top. Sky: ultramarine + white gradient. Remove tape.
- Sea base: Block the ocean with phthalo + teal, darker near the foreground, lighter near horizon.
- Waves: With a bristle brush, pull short horizontal strokes of a lighter mix. Keep lines thinner as they recede.
- Foam: Use a dry fan brush with thick white to suggest foam on the wave crests; soften a few with your finger.
Pro tips: Glaze a thin darker band beneath the main wave for shadow—it adds instant depth.
8) Mountain Layers
Graphic, peaceful, and very forgiving.
Materials: Three blues or grays + white, soft flat brush, chalk pencil.
Step by step:
- Sketch: Draw 3–5 mountain ranges overlapping.
- Paint back to front: Farthest range = lightest, soft-edged. Each closer layer gets darker and more defined.
- Atmosphere: Glaze a little white over far layers to “push” them back.
Pro tips: Keep peak shapes varied—mix sharp and rounded profiles for realism.
9) Pour Painting
Looks complex, but gravity does the heavy lifting.
Materials: Acrylics, pouring medium (per brand ratio), silicone oil (optional), disposable cups, stir sticks, tray, gloves.
Step by step:
- Mix: Combine each color with pouring medium to honey consistency. Add 1–2 drops silicone to 1–2 colors for cells.
- Dirty pour: Layer colors in one cup without stirring.
- Pour & tilt: Flip cup onto canvas or pour in a spiral. Tilt slowly to cover edges.
- Torch (optional): Briefly pass a kitchen torch to pop bubbles and encourage cells.
Pro tips: Less is more—too many colors can turn muddy. Let dry at least 24 hours on a level surface.
10) Mandala Canvas
Mindful, mesmerizing, and customizable to any palette.
Materials: Pre-painted dark background, dotting tools (or pencil erasers, skewers), several tints of 2–3 colors + white, compass or circular template.
Step by step:
- Center: Mark the center and light guide circles.
- Dots: Start with a medium dot in the center. Work outward in rings, alternating colors and dot sizes.
- Symmetry: Keep counts consistent per ring (e.g., 12 dots, then 24, etc.).
- Highlights: Add micro-dots of white on top of larger dots for sparkle.
Pro tips: Practice on paper first. Keep paint at pudding consistency so dots sit dome-shaped, not runny.
11) Cloudy Sky
Soft, dreamy, and great for learning blending.
Materials: Sky blues, ultramarine, white, touch of neutral gray, large soft brush, mop brush.
Step by step:
- Sky field: Blend a blue gradient from deeper at top to lighter near “horizon.”
- Clouds: With a dry brush, tap in white puffs, leaving varied edges. Add the faintest gray beneath for shadow.
- Soften: Use a clean mop brush to barely kiss the lower edges—instant fluff.
Pro tips: Reserve pure white for the sun-lit tops; everything else should be slightly toned.
12) Cactus Scene
Minimal, trendy, and high contrast.
Materials: Sunset palette (yellow/orange/pink) or desert neutrals, multiple greens, black for silhouettes, small round brush.
Step by step:
- Background: Paint a warm gradient (sunset) or sandy beige.
- Silhouettes: Sketch cacti of different heights. Fill either solid black for graphic style or in greens with subtle highlights for a softer look.
- Ground: Add a simple shadow line and a few pebbles.
Pro tips: Vary cactus arms and spacing; odd numbers usually compose better.
13) City Skyline at Night
Urban and cool, perfect for office corners and teens’ rooms.
Materials: Deep navy, indigo, black, white, small flat, liner brush, optional metallic for windows.
Step by step:
- Sky: Navy-to-indigo gradient with a few soft cloud glows.
- Skyline: Block a jagged silhouette in black at the bottom third. Mix building heights and roof shapes.
- Lights: Dot windows in soft warm white; sprinkle a few star specks above.
Pro tips: Glaze a faint halo of lighter blue behind the skyline to suggest atmospheric glow.
14) Rainbow Layers
Cheerful, bold, and great for kids’ spaces.
Materials: Primary and secondary colors + white, wide flat brush, tape (optional).
Step by step:
- Curve plan: Lightly sketch wide curved bands across the canvas.
- Paint: Fill each band. Blend edges just enough to soften without making brown.
- Pop: Add a slim white highlight along one side of each band for dimension.
Pro tips: Keep complementary colors separated by a buffer band to avoid muddy mixes.
15) Metallic Accents
Instant gallery feel with very little effort.
Materials: Neutral base palette, gold/copper/silver metallic acrylic, palette knife, soft flat.
Step by step:
- Abstract base: Paint an understated abstract in neutrals (stone, linen, warm gray).
- Metallic strikes: With a knife, lay a few confident metallic strokes. Resist overworking.
- Balance: Echo small metallic touches elsewhere so it doesn’t feel random.
Pro tips: Matte varnish on the background + gloss varnish on metallics creates luxe contrast.
16) Geometric Lines
Clean, modern, and endlessly customizable.
Materials: Painter’s tape, 3–4 bold colors + white, flat brushes, level/ruler.
Step by step:
- Map: Tape triangles or diamonds. Press edges firmly to prevent bleed.
- Paint: Fill shapes, alternating colors and values. Remove tape while paint is slightly wet for crisp lines.
- Layer: After drying, re-tape to add a second tier of smaller shapes for depth.
Pro tips: Limit your palette so it looks intentional; anchor with a neutral.
17) Seasonal Trees
One composition, four moods—sell it as a set or switch palettes by season.
Materials: Warm/cool seasonal palettes, black for trunks, round and liner brushes.
Step by step:
- Background: Paint a soft gradient (spring pinks, summer blues, fall ambers, winter slate).
- Tree: In black or dark brown, paint a simple trunk with branching structure—thicker at base, tapering upward.
- Foliage: Tap foliage with a round brush—spring blossoms (pink/white), summer leaves (greens), fall (oranges/reds), winter bare branches with snow dabs.
Pro tips: Keep branches asymmetrical and let some cross the frame edge for a natural look.
18) Drip Painting
Effortless drama that looks editorial.
Materials: Fluid acrylics or thinned heavy body acrylics, water or acrylic thinner, eyedropper or squeeze bottle, spray bottle, tarp.
Step by step:
- Thin: Mix paint to a milk-like consistency. Test a drip on scrap to ensure it runs but still covers.
- Load edge: Stand the canvas upright. Apply generous pools along the top edge with an eyedropper.
- Let gravity work: Tilt to control direction. Mist lightly with water to encourage longer rivulets or to merge colors.
- Pause and layer: Dry between colors to keep drips distinct; work darkest first, lights last for luminous veils.
- Finish: Lay flat to dry completely to avoid new runs.
Pro tips: A few decisive drips are more powerful than dozens. If drips start to puddle at the bottom, blot with a paper towel to keep the finish clean.
19) Pop Art Canvas
Bright retro fun.
Step by Step: Paint comic-style blocks. Add black outlines + dots.
20) Ombre Wash
Subtle but chic.
Step by Step: Blend one color family from dark to light across canvas. Keep brushstrokes horizontal.
21) Collage Canvas
Painting + mixed media.
Step by Step: Paint background wash. Glue magazine cutouts, fabric, or photos. Blend edges with paint. Seal with Mod Podge for finish.
Common Beginner Mistakes (and How to Avoid Them)
Using too much water: dilutes colors and weakens canvas surface. Skipping gesso: some canvases need a primer layer for paint to grip. Not sealing finished work: acrylic varnish protects your art from dust and fading. Overblending colors: let strokes show—texture is part of the magic.
Final Thoughts
Canvas painting is more than art—it’s therapy. These canvas painting projects prove you can create something chic whether you’re a total beginner or just want fresh ideas. From dreamy skies to bold abstracts, every brushstroke feels relaxing and expressive. Pick your favorite idea, grab your paints, and watch your canvas turn into something you’ll actually want to hang on the wall.