Why Clay Projects Are the Best DIY You’ll Ever Try
Clay is one of those materials that instantly makes you feel creative. Whether you’re working with air dry clay, polymer clay, or foam clay, you don’t need a kiln or expensive tools to create pieces that look boutique. The best part? Most of these small clay projects are practical—think dishes, organizers, jewelry, and décor that you’ll actually use. These useful clay projects turn a simple lump of clay into unique, long-lasting clay items you’ll be proud to display or gift.
Types of Clay You Can Use
If you’re new to clay art ideas, here are the most common types for crafting at home:
- Air Dry Clay: No oven required. Dries in 24–48 hrs, easy to sand and paint. Perfect for air dry clay gifts like trinket dishes or ornaments.
- Polymer Clay (like Fimo or Sculpey): Baked in a home oven. Great for mini clay art and clay trinkets like earrings or charms. Holds fine details.
- Foam Clay: Lightweight, dries spongy. Ideal for kids’ projects, cosplay props, and foam clay ideas like cute keychains.
- Stoneware/Porcelain Clay: Needs a kiln, more for advanced potters. You can skip this for DIY at home unless you’re serious about pottery.
Where to Buy Clay
The good news? Clay is affordable and easy to find.
- Amazon: Great for air dry and polymer clay kits.
- Craft stores (Michaels, Hobby Lobby, Joann, Papelaria/Armarinho in Brazil).
- Etsy: Small-batch specialty clays and handmade tools.
- Art supply shops: Best for bulk or professional-grade clays.
Pro Tip: Start with a 2 lb pack of white air dry clay—it’s versatile, cheap, and enough for several small clay projects.
Best Paints for Coloring Clay
One reason clay art ideas look so chic is the finishing. Here’s what works best:
- Acrylic paint: Budget-friendly, comes in endless colors. Works on air dry and polymer clay.
- Chalk paint: Gives a matte, pottery-style look. Great for cute clay crafts like trinket dishes.
- Watercolor wash: Diluted acrylic gives a soft, earthy vibe. Works beautifully on mini clay ideas.
- Metallic paint: Adds a luxe touch to rims and edges. Perfect for clay trinkets and jewelry.
- Sealers: Use clear acrylic spray or Mod Podge to make clay water-resistant and durable.
15 Clay Projects to Try (Step by Step)
1) Trinket Dishes
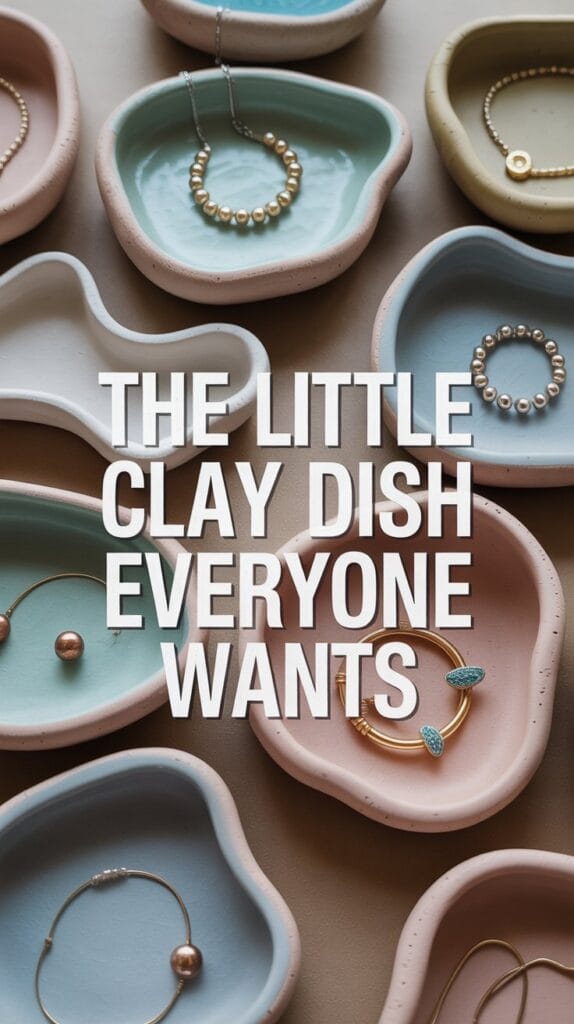
Bowls are one of the most functional decorations you can create with clay. With just your hands, you can shape small dishes to hold rings, keys, or incense. Add pressed leaves or lace for clay designs ideas art, or go bold with color clay ideas like metallics, marble, or soft pastel tones.
Because they’re lightweight, these bowls make air dry clay presents that everyone appreciates. They also sell well at craft fairs, since they’re both practical and decorative.
Here’s where you elevate them: instead of leaving them plain, use sculptural clay ideas like ridged edges, wave textures, or embedded designs. Suddenly, a simple dish becomes a sculpture aesthetic object that feels like it came from a boutique.
2) Clay Jewelry (Earrings & Pendants)
Turn clay scraps into wearable art.
Step by Step: Roll flat, cut with cookie cutters. Poke small holes with a skewer for jump rings. Bake (if polymer) or dry (if air dry). Sand smooth. Paint with acrylic or metallics, glaze for shine. Add hooks/chains.
Why it works: Small, lightweight, and stylish = perfect air dry clay gifts.
3) Mini Plant Pots

Perfect for succulents and cacti.
Step by Step: Roll clay into a ball, press thumb in center. Smooth walls upward. Let dry slowly to avoid cracks. Sand and seal with waterproof spray.
Paint tip: Use chalk paint for a ceramic-style matte finish.
4) Clay Coasters for coffe Table
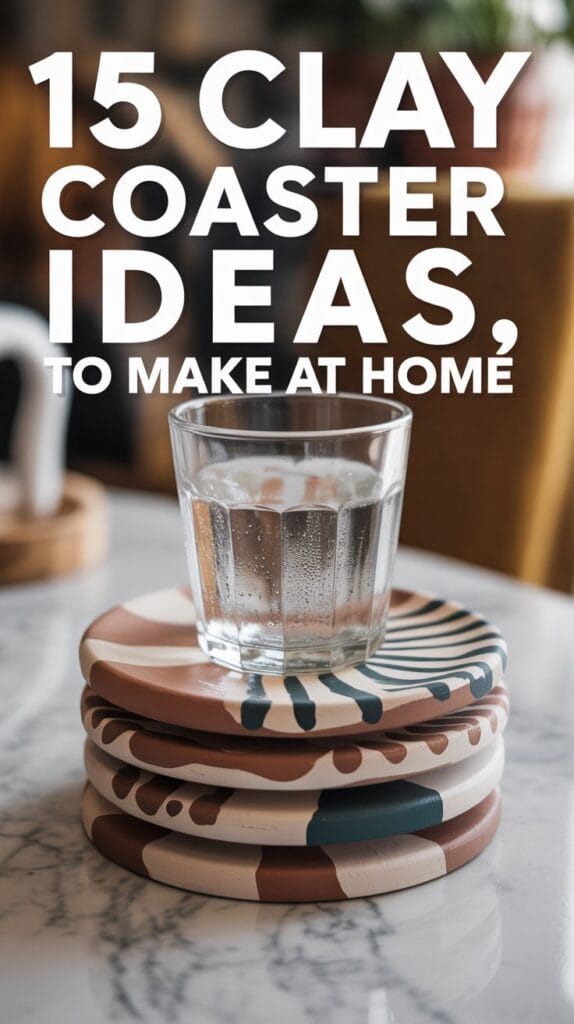
Coasters are the definition of useful clay projects because they’re practical, stylish, and surprisingly easy to make. Shape them into circles, hexagons, or organic free-forms, then decorate with clay designs ideas art like line drawings, terrazzo speckles, or marble effects.
Paint them with color clay ideas for a bold pop, or keep them natural for a Scandinavian aesthetic. Either way, they’re functional decorations that instantly elevate your living room.
Here’s the neuroscience trick: when people see beautiful handmade coasters under a coffee mug, they get that small dopamine hit of “wow, this feels special.” That’s the kind of detail that makes your craft memorable.
5) Clay Magnets
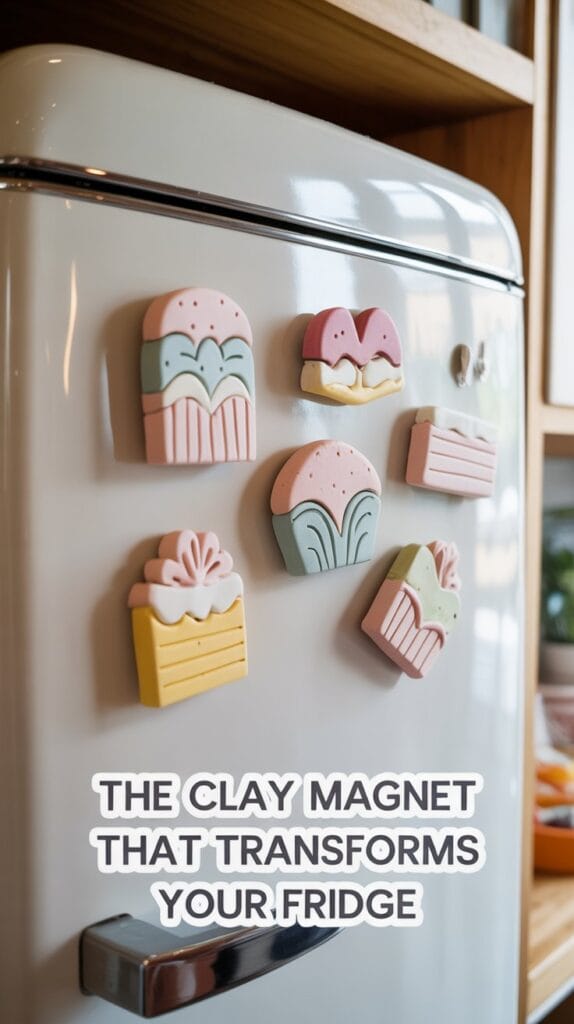
Magnets might sound small, but they’re one of the most useful clay projects you can make. With air dry clay fridge magnets DIY, you get to combine creativity with function. Imagine tiny clay animal inspo easy magnets shaped like pandas, cats, or owls holding up your grocery list, or minimal color clay ideas in geometric forms adding a modern pop to your kitchen.
Because they’re small clay projects, they dry quickly, making them perfect for beginners who want results fast. The best part? You can customize endlessly: paint them with colorful clay ideas, add texture, or even stamp them with initials to create personalized clay crafts air dry aesthetic. These aren’t just fridge accessories — they’re little pieces of art that upgrade your everyday routine.
6) Cute Clay Animals (Playful Yet Aesthetic)
If you’ve always wanted to sculpt but felt intimidated, clay animal inspo easy projects are the perfect starting point. Start with play dough ideas animals — whales, foxes, bears — and transform them into sculpture ideas easy that look modern and whimsical.
This is one of those cute easy clay ideas for beginners that gives you fast wins. Keep the shapes round and smooth, paint with simple details, and suddenly you have adorable miniatures that work as clay magnets, trinkets, or gifts.
Pro tip: group several together in a small display. It immediately looks like curated clay art crafts instead of beginner practice.
7) Clay Candle Holders
Candles are mood-setters, and nothing frames them better than a handmade holder. From minimalist cones to sculpture art clay simple wave shapes, these clay crafts air dry aesthetic become both useful and sculptural.
Use sculpture ideas easy for beginners: cylinders, arches, or stacked spheres. Then finish with a matte or glossy glaze for a sculpture aesthetic vibe. These projects don’t just look pretty; they actively change the atmosphere of your home.
And because they’re easy to replicate, they make excellent clay night ideas for small-batch crafting to sell
8) Clay Wall Hooks
Yes, hooks can be handmade.
Step by Step: Shape oval or rectangle, press a sturdy screw hook base in. Dry fully. Sand, paint, seal. Mount with wall anchor.
9) Personalized Keychains
Cute and practical.
Step by Step: Roll flat, cut tag or heart shape. Stamp initials with alphabet stamps. Poke hole for ring. Dry, paint, seal, add jump ring + keyring.
10) Photo Holders
Minimalist décor made easy.
Step by Step: Shape ball, flatten base. Insert wire bent into spiral before drying. Let harden, paint base. Clip photo or note into spiral.
11) Mini Sculptures
Perfect mini clay ideas for gifting.
Step by Step: Shape tiny animals, food, or abstract forms. Add details with toothpick or clay tools. Dry thoroughly, paint, glaze.
12) Soap Dishes
Spa-inspired handmade chic.
Step by Step: Roll flat, cut oval. Poke drainage holes with skewer. Curve edges slightly. Dry, sand, seal.
13) Clay Ornaments
Seasonal and sellable.
Step by Step: Roll clay, cut stars/hearts. Poke hole at top. Dry, sand, paint, seal. Add ribbon.
Pro Tip: Make sets in neutral tones for upscale holiday markets.
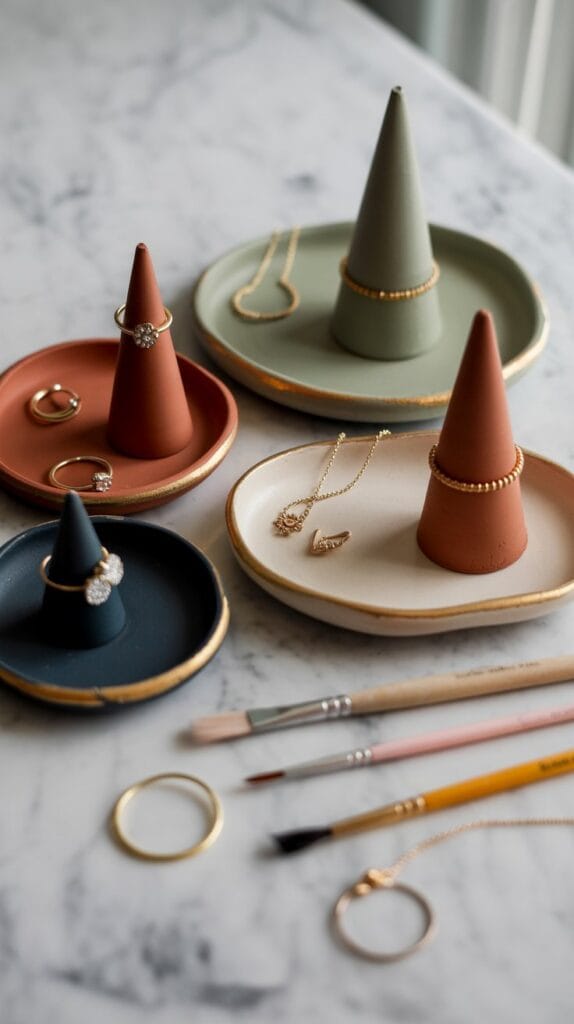
14) Ring Cones
Boutique jewelry storage.
Step by Step: Shape clay into cones. Smooth with damp sponge. Dry, sand, paint with metallic accents. Seal.
15) Clay Gift Tags
Reusable tags that double as keepsakes.
Step by Step: Roll clay, cut rectangles with hole at top. Stamp initials or patterns. Dry, sand, paint, seal. Tie on ribbon.
Final Thoughts
Working with clay is one of the most rewarding easy DIY arts and crafts you can try. From clay trinkets like keychains and magnets to useful clay projects like coasters, dishes, and plant pots, every piece is both creative and practical. The right clay, paints, and finishes make your small clay projects look professional—even sellable. Whether you’re gifting air dry clay ideas to friends or starting a small side hustle, clay crafts are a stylish way to turn imagination into something tangible.