If you have ever looked around your craft room and felt more overwhelmed than inspired, you are not alone. A lot of the time, the problem is not that the room is too small. It is that the setup is working against you.
When your tools are scattered, your table turns into storage, and your fabric seems to multiply overnight, even a room you love can start to feel stressful. The good news is that a better setup does not always mean a bigger room or expensive furniture. Sometimes, a few smart changes can make everything feel easier.
These craft room setup tips are all about helping you save space, reduce visual clutter, and create a room that feels calm enough to enjoy and practical enough to actually use.
1. Start with one main work zone
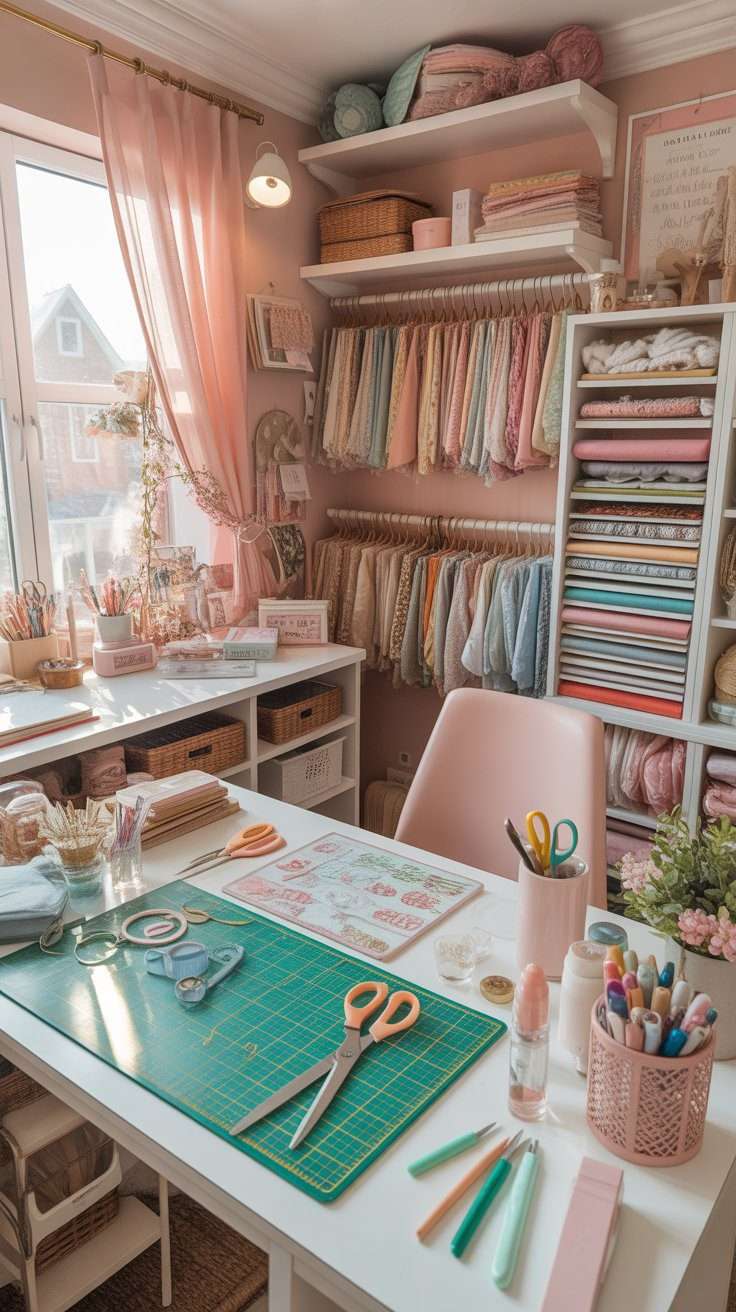
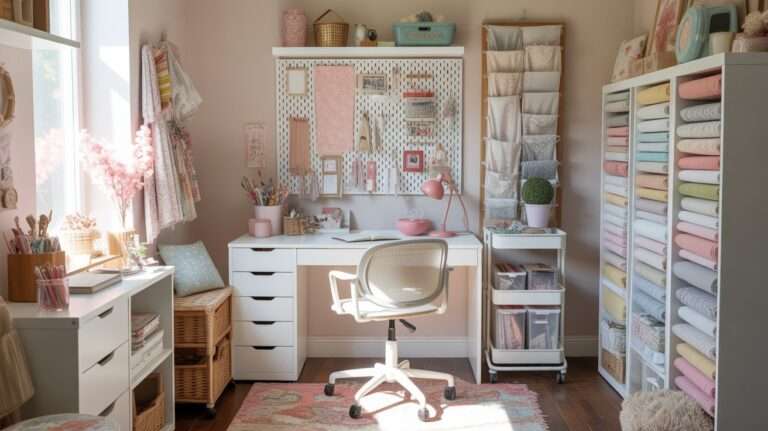
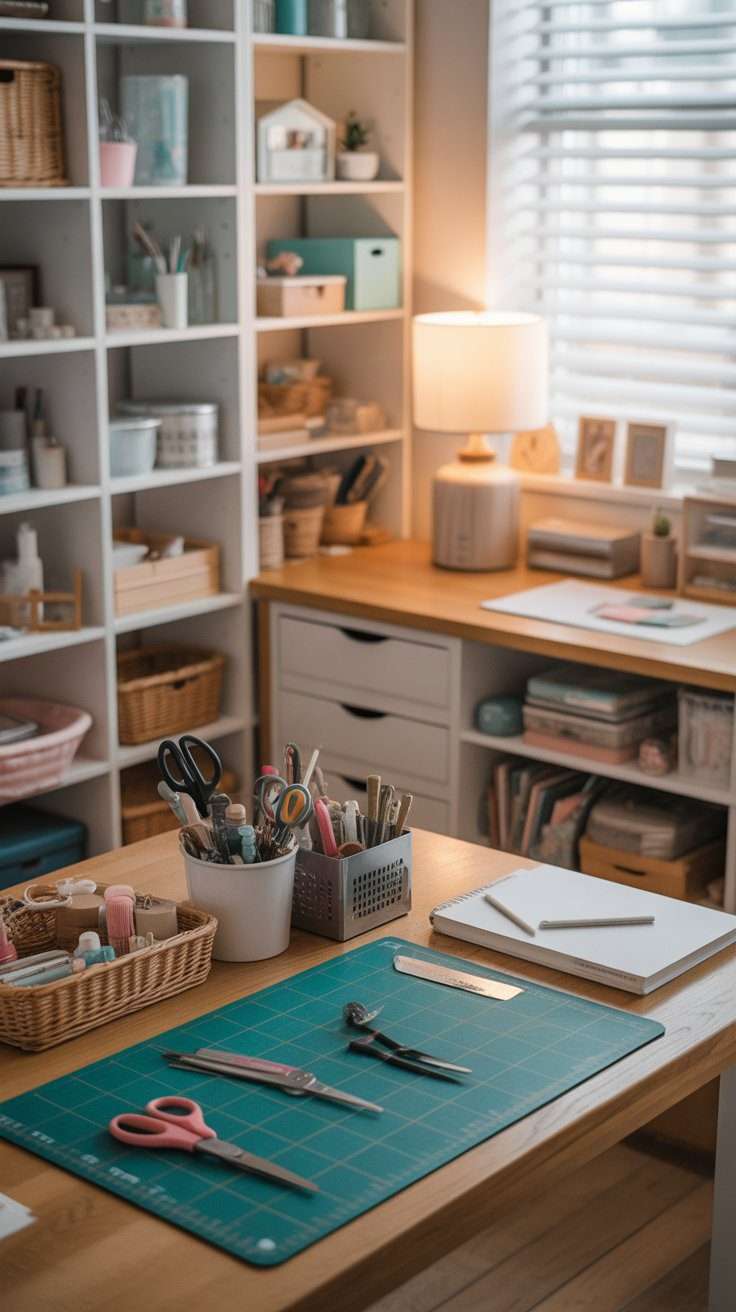
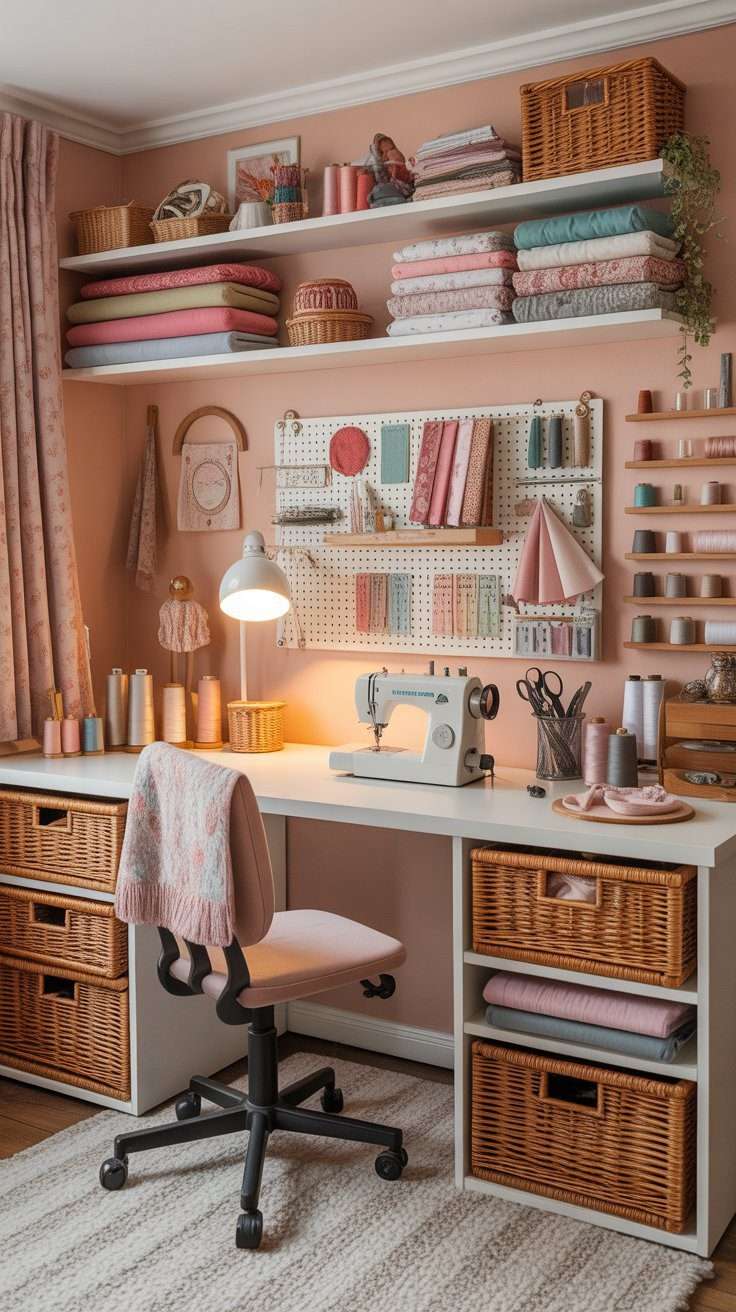
One of the easiest ways to make a craft room feel less chaotic is to choose one main work zone and make that the center of everything. This is the area where you do most of your actual creating, whether that means sewing, cutting fabric, painting, scrapbooking, or working on smaller DIY projects.
A lot of rooms start feeling stressful when every surface becomes a half-workstation. The desk holds ribbon, the side table holds scissors, the floor has baskets, and the shelf becomes a place for unfinished projects. When that happens, the room stops supporting your workflow.
A lot of these same setup ideas also work well in a home workspace, especially if you are trying to make one desk area do more than one job. I shared more inspiration in these small home office ideas that feel cozy and organized.
If you are working with a tighter layout, take a look at my post on small craft room ideas that actually work, because small spaces need a setup that is even more focused.
2. Keep your most-used supplies within easy reach

Your everyday tools should never be buried behind things you rarely use. If you have to dig through bins every time you need scissors, tape, glue, pins, a ruler, or thread, your room will always feel more frustrating than it should.
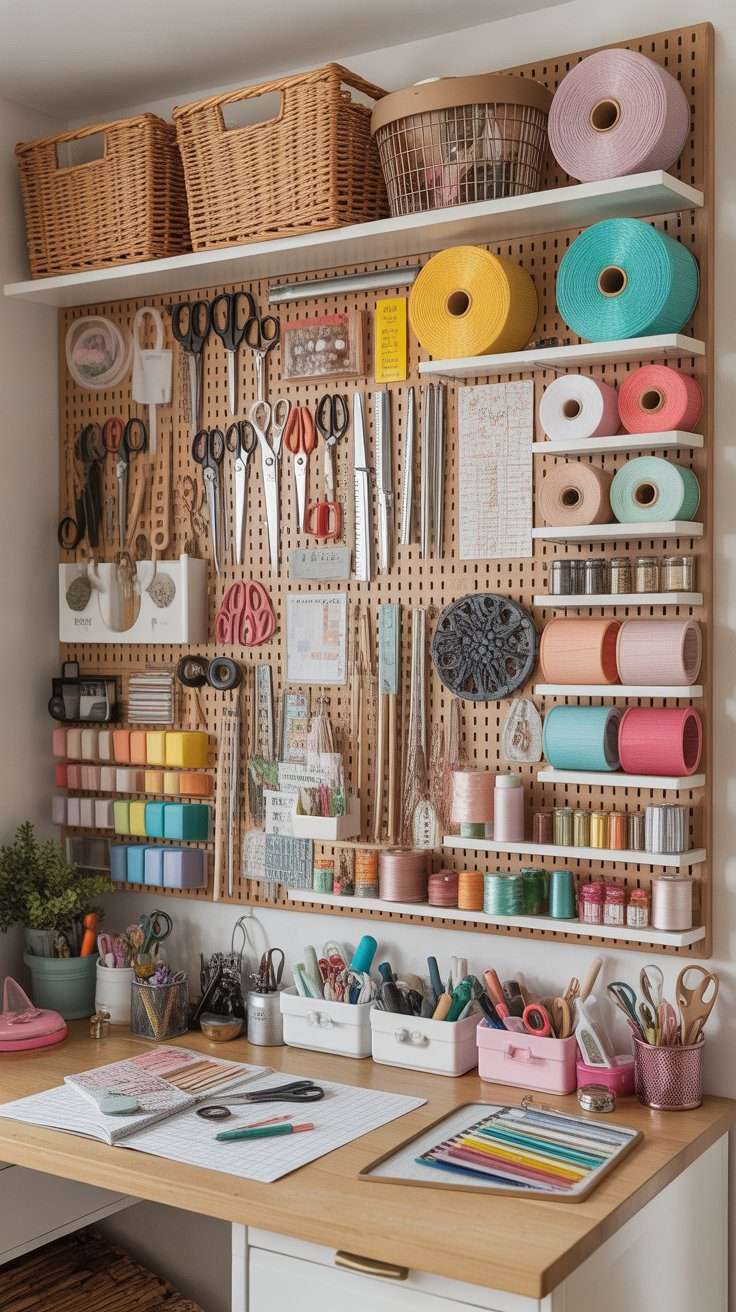
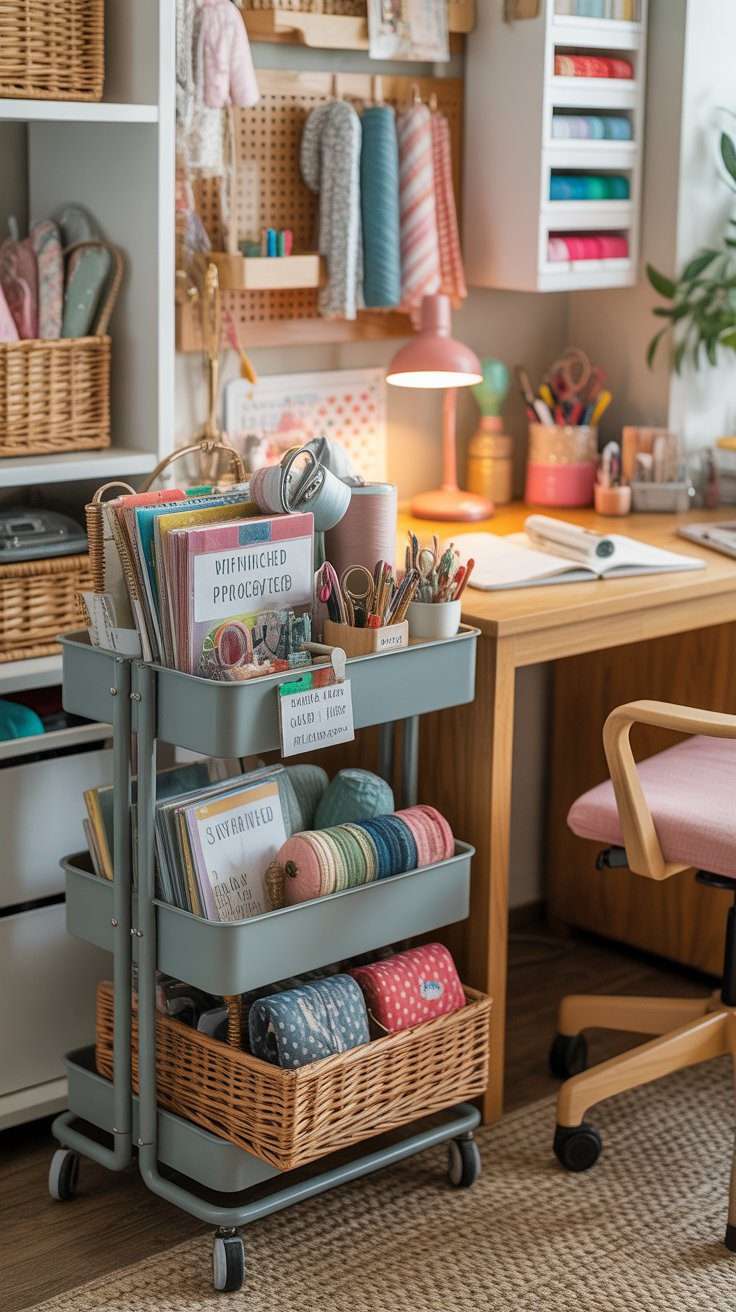
Think about the supplies you reach for almost every time you sit down to make something. Those are the items that deserve the best spots. A drawer near your table, a rolling cart beside your chair, a pegboard above your workspace, or small open containers on a shelf can make a huge difference.
The goal is not to have everything visible. The goal is to make the things you use most easy to grab and easy to put back.
If sewing tools are the main problem area for you, my post on craft room organization ideas for sewing supplies will help you organize those items in a way that actually stays manageable.
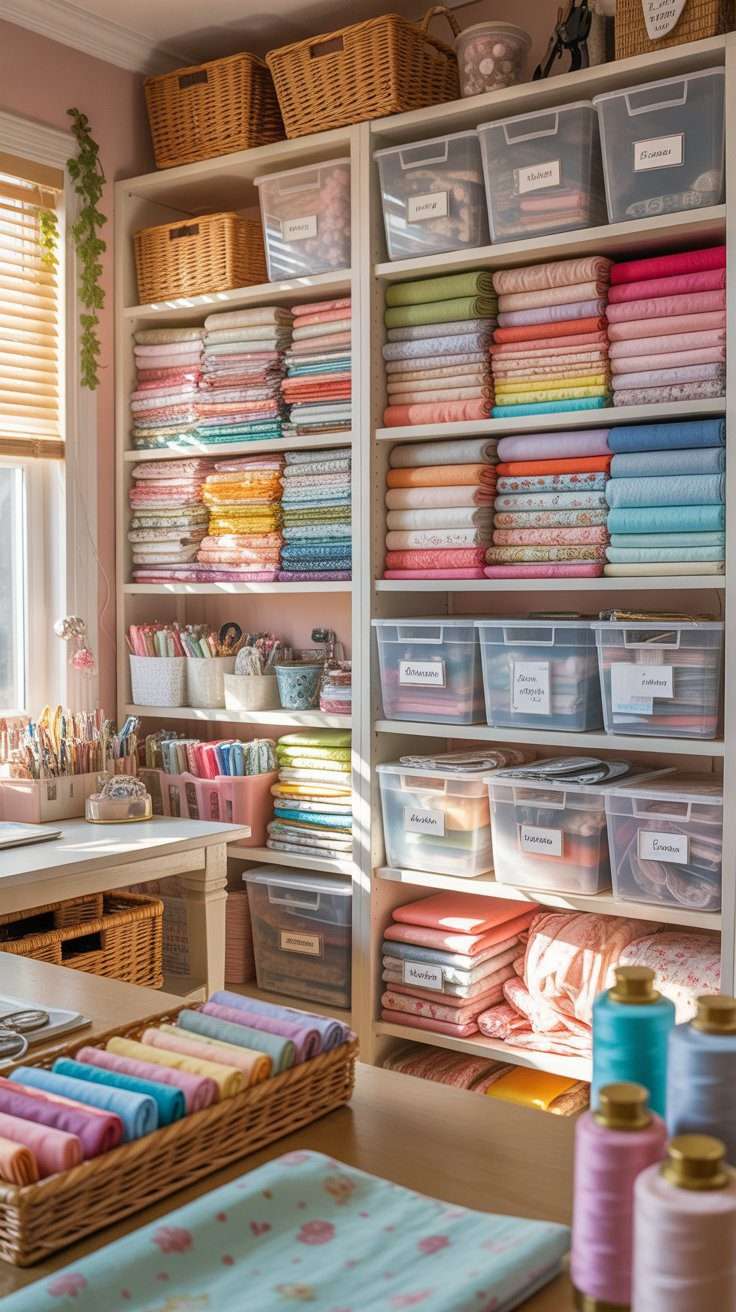
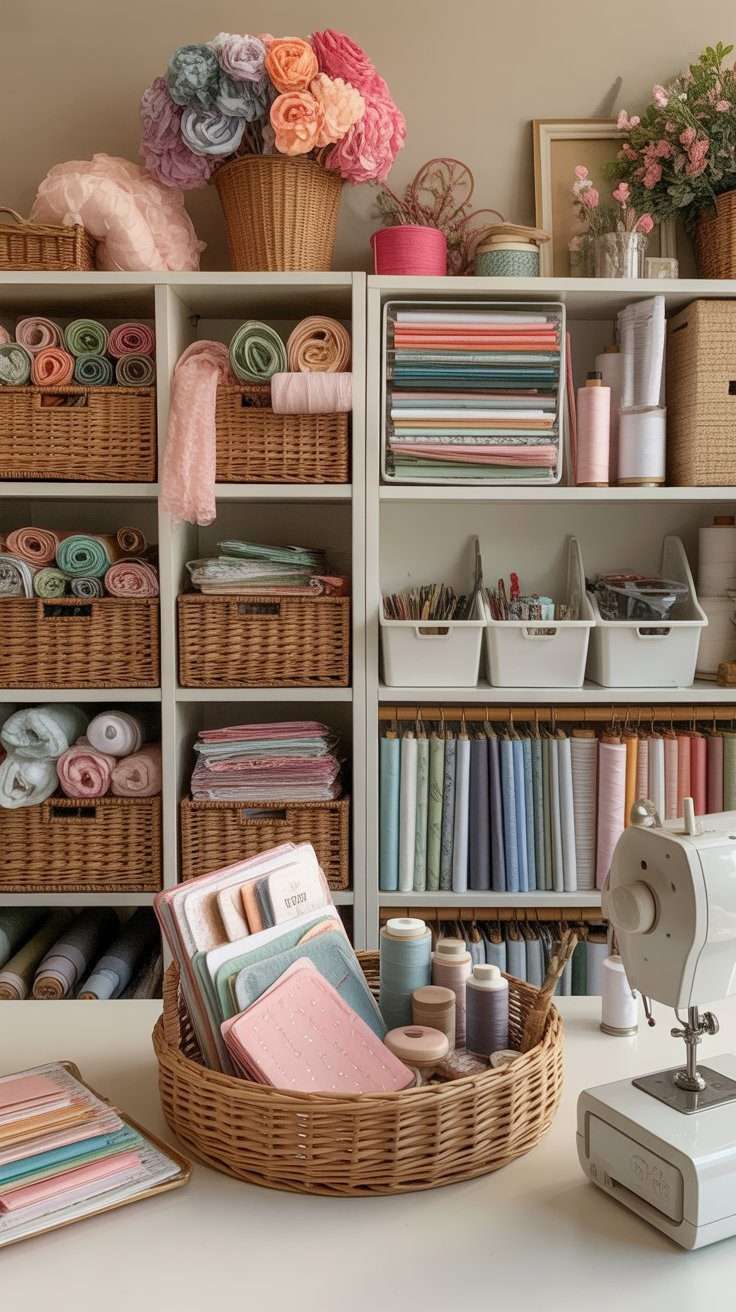
3. Give fabric its own storage zone
Fabric can take over a room so quickly if it does not have a designated home. Even if you are careful, folded pieces start stacking up, scraps get mixed in with larger cuts, and before long the room looks fuller than it really is.
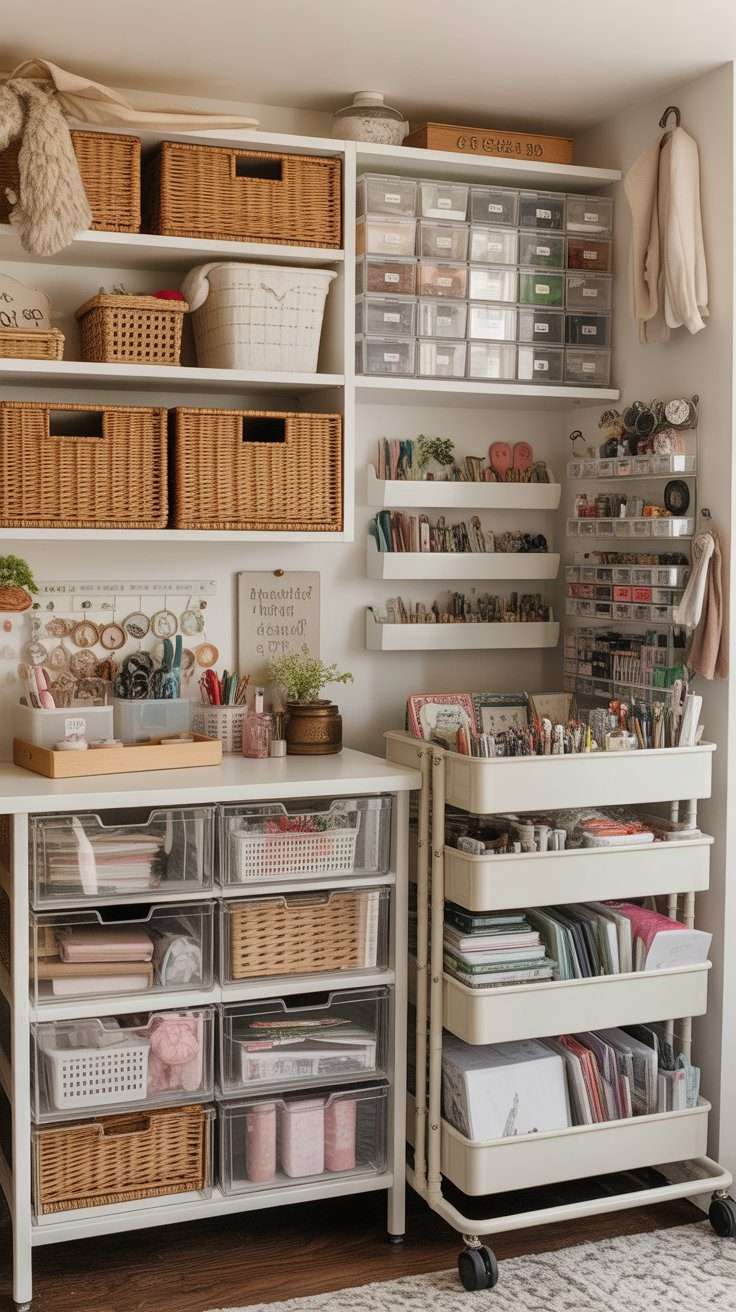
One of the best craft room setup tips is to give fabric its own storage zone from the beginning. That might be a shelf, drawers, clear bins, a cabinet, or even a rolling cart if your space is small. What matters is that fabric is not drifting into every corner of the room.
You can also separate fabric by type, color, or purpose depending on how your brain works best. Some people prefer to sort by project type. Others like seeing similar colors together. There is no one right system, but there does need to be a system.
If fabric is the thing that keeps making your room feel crowded, you can find more practical ideas in my post on fabric storage ideas for a small craft room.
4. Use vertical space before adding more furniture
When a room starts feeling full, the first instinct is often to add another shelf, cabinet, or cart. But before you buy more furniture, take a look at your walls.
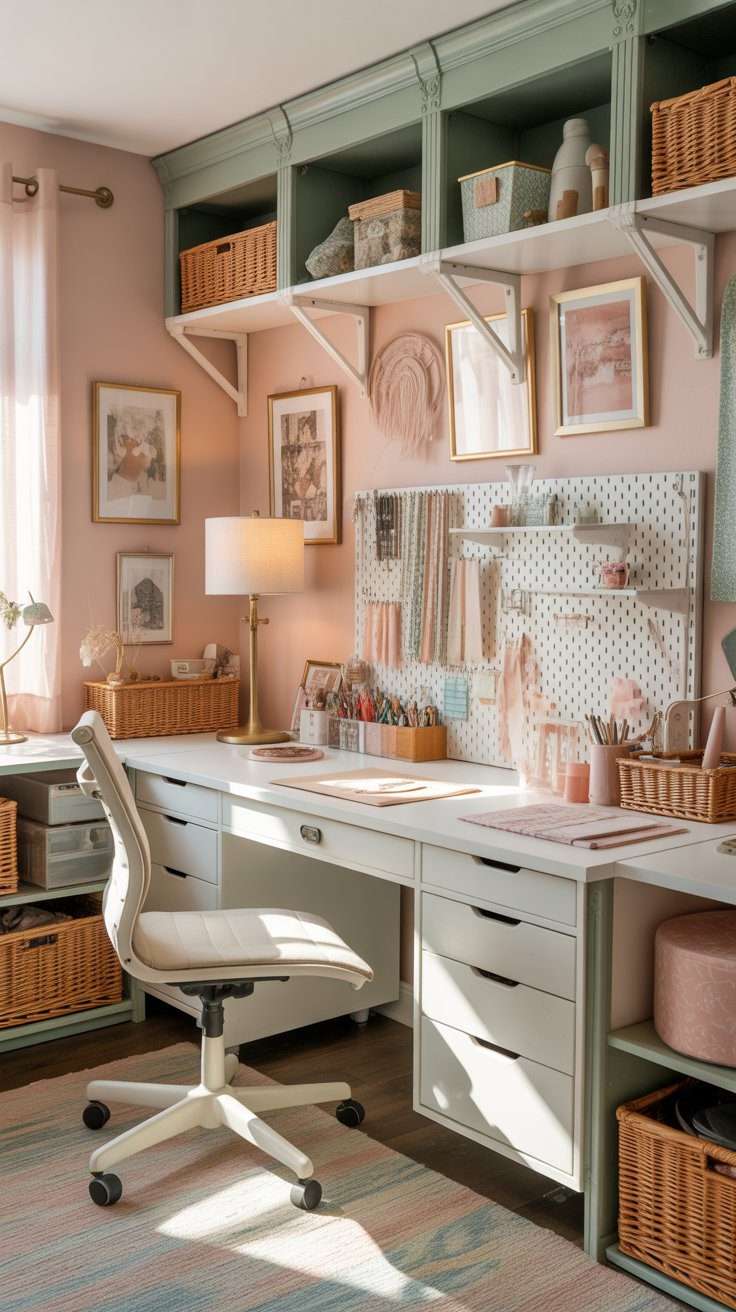
Vertical storage is one of the easiest ways to save space in a craft room without making the room feel heavier. Wall shelves, pegboards, hanging organizers, hooks, rail systems, and even mounted baskets can hold a surprising amount while keeping your floor clearer.
This works especially well for supplies that are useful to see at a glance, like scissors, rulers, thread, ribbon, cutting tools, washi tape, or frequently used jars and containers.
Using the wall space also helps protect your table from becoming a drop zone for everything that does not have a home.
5. Choose storage that is easy to reset
A beautiful system does not help much if it is annoying to maintain. One of the biggest reasons craft rooms become stressful again so quickly is that the storage looks good in theory but is too complicated in real life.
If you want your room to stay organized, choose storage that is easy to reset after you finish crafting. Open bins, clear drawers, labeled baskets, and simple dividers usually work better than complicated systems that require too much refolding, stacking, or rearranging.
Ask yourself one honest question: can I put this away quickly when I am tired?
If the answer is no, there is a good chance the system will not last.
A room that is easy to reset feels lighter every single day, not just right after a big cleaning session.
6. Do not let your craft table become storage
This is one of the biggest setup mistakes in any craft room. Once the table starts holding extra supplies, stacks of fabric, decor, unfinished projects, and random bins, it stops functioning as a workspace.
When that happens, every project begins with clearing space. That adds resistance before you even get started, and over time it can make you use the room less.
Your craft table should be protected as much as possible. It is your main working surface, not your overflow shelf.
Try keeping only the essentials on or near the table. A small caddy for tools you use constantly is fine. A lamp is fine. A tray for the current project is fine. But the more permanent storage lives on the table, the harder the room becomes to use.
If you need more ideas for making your room easier to function in day to day, my post on 12 craft room ideas that make sewing and crafting easier.
7. Separate current projects from backstock supplies
One reason a craft room can feel stressful is that everything gets mixed together. New supplies, backstock, unfinished projects, scraps, seasonal materials, tools, and everyday essentials all end up in the same visual space.
A much better setup is to separate what you are using right now from what you are storing for later. Your current project should have its own basket, tray, drawer, or small cart so you can pause and come back without creating a mess across the whole room.
Backstock supplies, on the other hand, should be stored farther away. You do not need five extra rolls of ribbon or backup paint bottles next to your work surface. They only make the room feel busier.
This one small shift can make a room feel calmer almost immediately, especially in smaller spaces where every inch matters.
That is also why small craft room ideas that actually work can be so helpful, because tighter rooms really need each area to have a purpose.
8. Set up your room around how you actually craft
A lot of craft rooms look nice but do not really support the person using them. That is because they were organized around what looked good instead of what made sense for the actual projects being done there.
If you sew all the time, your setup should make sewing easier. If you mostly work with paper, vinyl, paint, or mixed media, those tools should shape the room instead.
Think about your most common projects and ask yourself what you need close by, what you need stored safely, and what tends to create the most mess. Then organize around that reality.
For example, someone who sews regularly may want thread, scissors, clips, rulers, fabric, and pressing tools close to the main table. Someone doing general crafts may need easier access to paper, glue, cutting mats, markers, and smaller containers.
Your room should match your habits, not somebody else’s Pinterest-perfect version of crafting.
9. Create one simple zone for unfinished projects
Unfinished projects are normal. The problem is not having them. The problem is when they end up spread across your table, chair, shelf, and floor all at once.
One of the best ways to reduce stress in a craft room is to create one simple unfinished-project zone. That could be a basket under the table, a rolling cart with two shelves, a file box, or a dedicated tray on a lower shelf.
This gives you somewhere to pause without making the whole room feel messy. It also helps you keep project materials together, which saves time later when you are ready to continue.
You do not need a perfect room. You just need a room that can handle real life without collapsing into clutter every time you get interrupted.
10. Make it pretty, but practical first
It is easy to get pulled into the visual side of craft rooms, especially when you see beautiful images online. And yes, a room that feels pretty can be really motivating. But if the setup is not practical, the room will become stressful no matter how nice it looks.
Start with the function. Make sure your table works, your supplies are easy to reach, your fabric has a home, and your current projects are contained. After that, add the pretty details that make you happy.
That might mean matching bins, a soft lamp, a pinboard, a pretty chair cushion, framed prints, or colors you love. Those things absolutely matter. They help make the room feel personal and inviting. But they work best when the foundation of the room is already supporting your workflow.
A craft room that saves space and stress is usually not the fanciest one. It is the one that feels easy to use.
Final thoughts
A better craft room setup is not really about buying more. It is about making your room work better for the way you create.
When your main work zone is clear, your most-used tools are close by, your fabric has a real storage area, and your unfinished projects are contained, the whole room starts feeling lighter. You spend less time moving things around and more time actually making things.
If you are trying to improve your space step by step, I would start with the biggest pain point first. For some people that is fabric. For others it is table clutter, sewing supplies, or trying to make a small room do too much at once.
If that sounds familiar, these posts may help you keep building your setup in a more practical way:
Take a look at fabric storage ideas for a small craft room, craft room organization ideas for sewing supplies, small craft room ideas that actually work, and 12 craft room ideas that make sewing and crafting easier.
FAQ
What is the best layout for a small craft room?
The best layout for a small craft room usually starts with one main work zone and storage placed around it. Keeping your most-used supplies close to your table and using vertical wall space can help the room feel more open and easier to use.
How do I organize a craft room without spending a lot?
You do not need expensive furniture to organize a craft room. Clear bins, baskets, drawer dividers, simple shelves, and rolling carts can work really well. The most important thing is giving each type of supply a home that is easy to maintain.
What should be in a basic craft room setup?
A basic craft room setup should include a usable work surface, storage for your most-used tools, a designated area for larger supplies like fabric or paper, and a simple place to keep unfinished projects contained.
How do I make my craft room less stressful?
To make your craft room feel less stressful, focus on reducing visual clutter, keeping your table clear, storing similar supplies together, and making it easy to put things away after each project. A room that is easy to reset usually feels much calmer.