
Summer art projects for kids are so much better when they feel like a real little project — not just coloring a page, but using paint, paper plates, cotton balls, sponges, stamps, glue, shells, tissue paper, and all those simple craft supplies that make kids excited to create.
I love these kinds of summer art ideas because they are colorful, hands-on, and easy to set up without needing anything fancy. Some are a little messy, some are more calm, but all of them feel bright, creative, and perfect for sunny days at home, camp, or in the classroom.
So if you need easy summer art projects for kids that actually feel fun to make, these ideas are full of beach scenes, fruit art, ocean textures, ice cream colors, sunshine crafts, and simple mixed media projects kids can enjoy.
1. Summer Art Projects for Kids Shaving Bubble Wrap Ocean
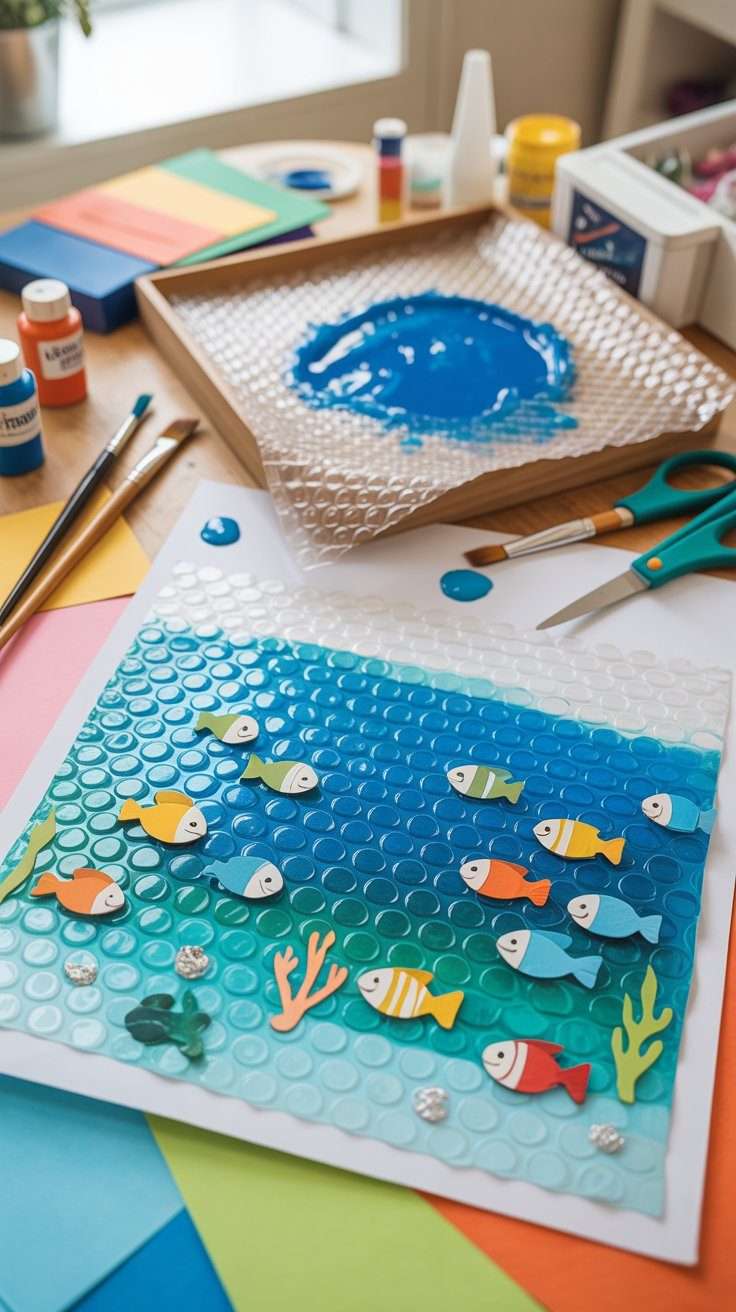
This bubble wrap ocean art project is such a fun way to make a summer ocean scene with lots of texture. Kids can paint bubble wrap in bright ocean shades like blue, teal, and turquoise, press it onto paper, and then layer cute fish cutouts on top. The bubble print gives the background a watery look, and the fish make the whole project feel colorful, playful, and very summery.
What you need:
- Bubble wrap
- White cardstock or thick white paper
- Blue paint
- Teal paint
- Turquoise paint
- White paint
- Paintbrush
- Scissors
- Glue stick
- Colored paper
- Black marker
- Paper plate or paint tray
- Paper towels
How to make it:
- Cut a piece of bubble wrap that fits your paper size.
- Add blue, teal, turquoise, and a little white paint onto the bubble wrap.
- Spread the paint lightly with a brush so the bubble texture still shows.
- Press the painted bubble wrap onto the white cardstock.
- Lift it carefully to reveal the ocean texture.
- Let the painted background dry completely.
- Cut fish shapes from colored paper in different sizes and colors.
- Add small details like fins, stripes, or eyes with a black marker.
- Glue the fish onto the bubble wrap ocean background.
- Add seaweed, coral, or small bubbles if you want extra detail.
- Let the whole project dry flat.
- Display the finished ocean art.
2. Summer Art Projects for Kids Paper Plate Beach Scene
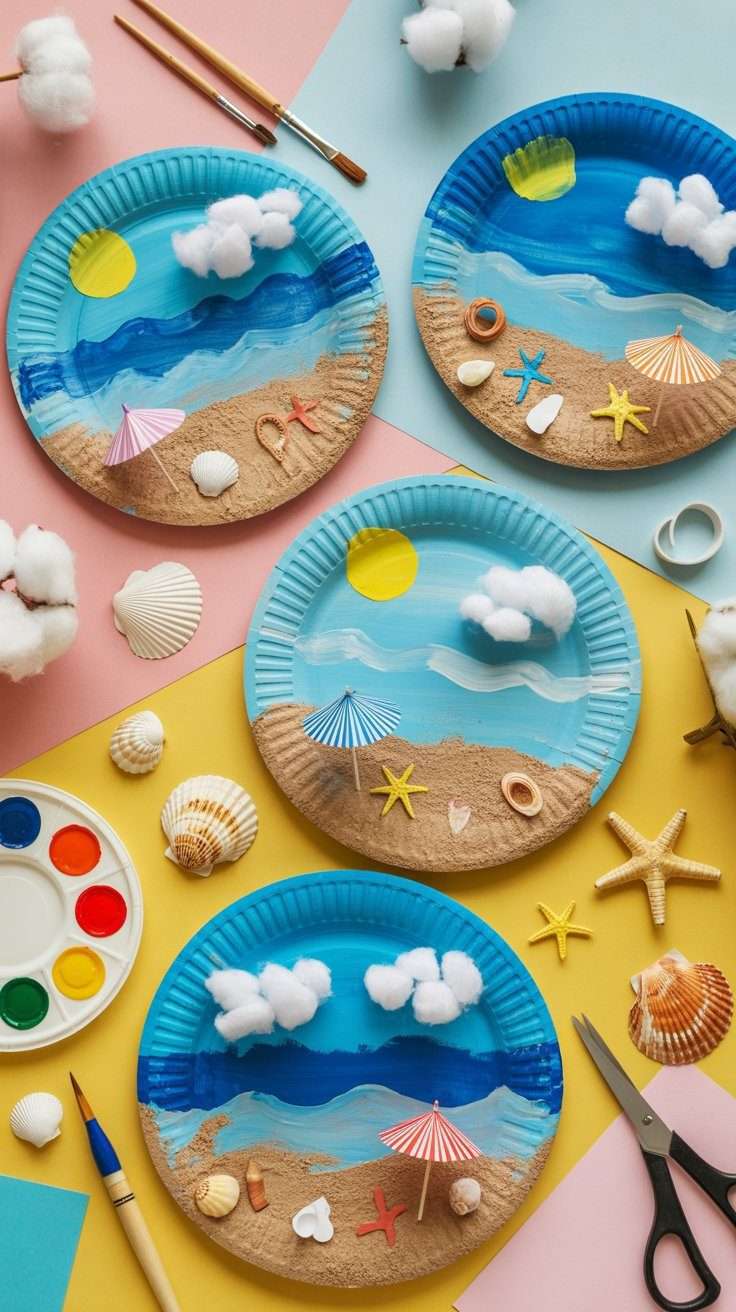
A paper plate beach scene is a perfect summer art project because kids get to build a whole little beach on one plate.
They can paint the sky and ocean, add sand-colored paper, glue on cotton clouds, and decorate the beach with paper umbrellas, shells, or tiny starfish.
What you need:
- Paper plates
- Blue, yellow, and tan paint
- Paintbrushes
- Cotton balls
- Small shells, optional
- Colored paper
- Glue
- Scissors
How to make it:
- Paint the top of the plate blue for sky and ocean.
- Paint or glue tan paper on the bottom for sand.
- Add white waves with paint.
- Glue cotton balls for clouds.
- Add paper umbrellas, shells, or starfish.
- Let everything dry before displaying.
3. Dot Marker Summer Fruit Art
Dot marker fruit art is simple, colorful, and perfect for summer.
Kids can fill watermelon, strawberry, lemon, orange, or pineapple outlines using dot markers. The dotted texture makes the fruit look playful and bright without needing careful painting.
What you need:
- Fruit outline printable or hand-drawn shapes
- Dot markers
- White cardstock
- Black marker
- Green marker
- Paper towel
How to make it:
- Draw or print fruit shapes on cardstock.
- Let kids fill the fruit with dot markers.
- Use green dots for leaves or rind.
- Add seeds with a black marker.
- Let the page dry.
- Display the fruit art or cut it out for a garland.
4. Sponge Stamp Lemonade Art
This lemonade art project uses sponges to make lemons, cups, and bright summer patterns.
Kids can stamp yellow circles for lemon slices, add green leaves, and create a cute lemonade-themed art page or sign.
What you need:
- Small sponges
- Yellow paint
- White cardstock
- Green paper or marker
- Pink paper
- Glue
- Scissors
- Paint tray
How to make it:
- Cut a sponge into circles or lemon shapes.
- Dip the sponge into yellow paint.
- Stamp lemons across the paper.
- Add paper cups, straws, or leaves.
- Draw details with markers.
- Let the lemonade art dry.
5. Cotton Ball Ice Cream Cone Art
This is a cute summer art project because the cotton balls make the ice cream look fluffy and textured.
Kids can glue cotton balls onto paper scoops, paint them in pastel colors, and add paper sprinkles or a cherry on top.
What you need:
- Cotton balls
- Brown construction paper
- White cardstock
- Paint
- Glue
- Colored paper scraps
- Scissors
- Markers
How to make it:
- Cut a cone shape from brown paper.
- Glue it onto cardstock.
- Glue cotton balls above the cone as scoops.
- Paint the cotton balls like ice cream flavors.
- Add paper sprinkles and a cherry.
- Let the art dry completely.
6. Salt Paint Firework Art
Salt painting makes summer fireworks look sparkly and raised.
Kids can draw firework lines with glue, sprinkle salt on top, then touch watercolor paint to the salt and watch the color spread.
What you need:
- Black cardstock
- White glue
- Table salt
- Watercolor paint
- Paintbrush
- Tray
- Paper towel
How to make it:
- Draw firework shapes with glue on black paper.
- Sprinkle salt over the glue.
- Shake off extra salt.
- Touch watercolor paint to the salt lines.
- Watch the color spread.
- Let the artwork dry flat.
7. Tissue Paper Sun Catcher Art
This summer sun catcher project looks beautiful in a window.
Kids can layer bright tissue paper pieces inside a sun, popsicle, fruit, or beach ball shape to create colorful translucent art.
What you need:
- Tissue paper
- Contact paper
- Black cardstock
- Scissors
- Pencil
- Tape
- String, optional
How to make it:
- Cut a summer shape from black cardstock.
- Place contact paper behind the shape.
- Add small tissue paper pieces inside.
- Seal with another contact paper layer.
- Trim the edges.
- Hang it in a sunny window.
8. Seashell Texture Painting
This project uses real shells as both inspiration and stamping tools.
Kids can press shells into paint, stamp textures onto paper, and build a beach-inspired art page with sand colors, ocean blues, and shell patterns.
What you need:
- Seashells
- Blue, tan, white, and coral paint
- White cardstock
- Paint tray
- Paintbrush
- Paper towels
How to make it:
- Add paint to a tray.
- Dip seashells lightly into paint.
- Press them onto cardstock to make shell prints.
- Add ocean waves or sand with a brush.
- Layer different shell shapes.
- Let the page dry.
9. Bubble Wrap Ocean Art
Bubble wrap makes a perfect ocean texture for summer art.
Kids can paint bubble wrap with blue and teal paint, press it onto paper, and use the bubbly background for fish, shells, boats, or sea animals.
What you need:
- Bubble wrap
- Blue and teal paint
- White cardstock
- Paintbrush
- Colored paper
- Glue
- Scissors
How to make it:
- Paint bubble wrap with ocean colors.
- Press it onto cardstock.
- Peel it away to reveal texture.
- Cut fish or shells from paper.
- Glue them onto the ocean background.
- Add details with markers.
10. Paper Plate Watermelon Fan Art
A paper plate watermelon fan is part art project and part summer craft.
Kids can paint a paper plate like a watermelon slice, add black seeds, fold it slightly, and attach a craft stick handle.
What you need:
- Paper plate
- Pink, green, and white paint
- Black marker or black paper
- Craft stick
- Glue
- Scissors
- Paintbrush
How to make it:
- Cut a paper plate in half.
- Paint the middle pink.
- Paint the edge green for the rind.
- Add black seeds.
- Glue a craft stick to the back.
- Let it dry before using as decoration.
11. Fork Painted Sunflower Art
Fork painting makes sunflower petals look textured and fun.
Kids can dip a plastic fork into yellow paint and press it around a brown center to create a bright summer flower.
What you need:
- White cardstock
- Yellow paint
- Brown paint
- Green paint
- Plastic fork
- Paintbrush
- Paper plate
How to make it:
- Paint a brown circle in the center.
- Dip a fork into yellow paint.
- Press fork marks around the circle.
- Paint a stem and leaves.
- Add dots in the flower center.
- Let the sunflower dry.
12. Pool Noodle Stamp Art
Pool noodles make fun summer stamps for circles, flowers, bubbles, and beach ball patterns.
Cut a small piece of pool noodle, dip the end into paint, and stamp colorful shapes onto paper.
What you need:
- Small pool noodle pieces
- Washable paint
- White cardstock
- Paint tray
- Markers
- Paper towels
How to make it:
- Cut pool noodle pieces into stamp sizes.
- Dip the end into paint.
- Stamp circles onto cardstock.
- Turn circles into flowers, bubbles, or beach balls.
- Add details with markers.
- Let the artwork dry.
13. Yarn Wrapped Sunshine Art
This project gives kids a hands-on art activity with texture.
They can cut a sun shape from cardboard and wrap yellow, orange, and gold yarn around it to create a bright summer sunshine decoration.
What you need:
- Cardboard
- Yellow and orange yarn
- Scissors
- Tape
- Marker
- Glue
- Hole punch, optional
How to make it:
- Cut a sun shape from cardboard.
- Tape one end of yarn to the back.
- Wrap yarn around the sun.
- Add more colors for texture.
- Glue or tape the end in place.
- Hang it or display it on cardstock.
14. Straw Blown Summer Flower Art
Straw blowing makes flowers look loose, colorful, and creative.
Kids can drop watery paint onto paper and blow through a straw to spread it into flower petals or stems.
What you need:
- White cardstock
- Watered-down paint
- Straw
- Dropper or spoon
- Markers
- Paper towel
- Paint tray
How to make it:
- Add small drops of paint to the paper.
- Blow through a straw to spread the paint.
- Repeat with different colors.
- Let the paint dry.
- Add stems, leaves, or centers with markers.
- Display as summer flower art.
15. Coffee Filter Butterfly Art
Coffee filter butterflies are colorful, simple, and perfect for summer.
Kids can color coffee filters with washable markers, spray them with water, and watch the colors blend before turning them into butterfly wings.
What you need:
- Coffee filters
- Washable markers
- Spray bottle with water
- Pipe cleaners
- Clothespins, optional
- Paper towels
How to make it:
- Flatten the coffee filter.
- Color it with washable markers.
- Spray lightly with water.
- Let the colors blend and dry.
- Pinch the center.
- Wrap with a pipe cleaner to make butterfly wings.
Final Thoughts
Summer art projects for kids should feel colorful, hands-on, and fun to make.
The best ones are not just about painting a picture. They let kids stamp, glue, swirl, wrap, press, sprinkle, fold, and build something with simple materials.
Some links in this post may be affiliate links, which means I may earn a small commission at no extra cost to you.