

How to press fall leaves is one of those simple autumn crafts that feels almost too easy, but the results can be so beautiful. You go outside, find those pretty red, orange, yellow, and golden leaves, bring them home, and suddenly you have free craft supplies for bookmarks, wall art, garlands, cards, scrapbooks, table decor, and cozy fall projects.
But here is the little problem: fall leaves can curl, turn brown, get brittle, or lose that beautiful autumn color if you do not press them the right way.
Best Leaves to Press
Look for leaves that still feel flexible, not too dry or crunchy. If the leaf is already breaking apart in your hand, it will probably crumble after pressing too. Try to choose leaves with strong autumn color, like red maple leaves, yellow birch leaves, orange oak leaves, or small leaves with pretty shapes. Avoid leaves that are wet, moldy, torn, or already curled too much.
How to Prepare Fall Leaves Before Pressing
Before pressing fall leaves, gently wipe off dirt or moisture with a paper towel. If the leaves are damp, let them air dry for a little while first. You do not want to press wet leaves because they can mold between the pages. Also, do not wash the leaves unless they are very dirty. Too much water can make them harder to preserve.
Method 1: Press Fall Leaves in a Book
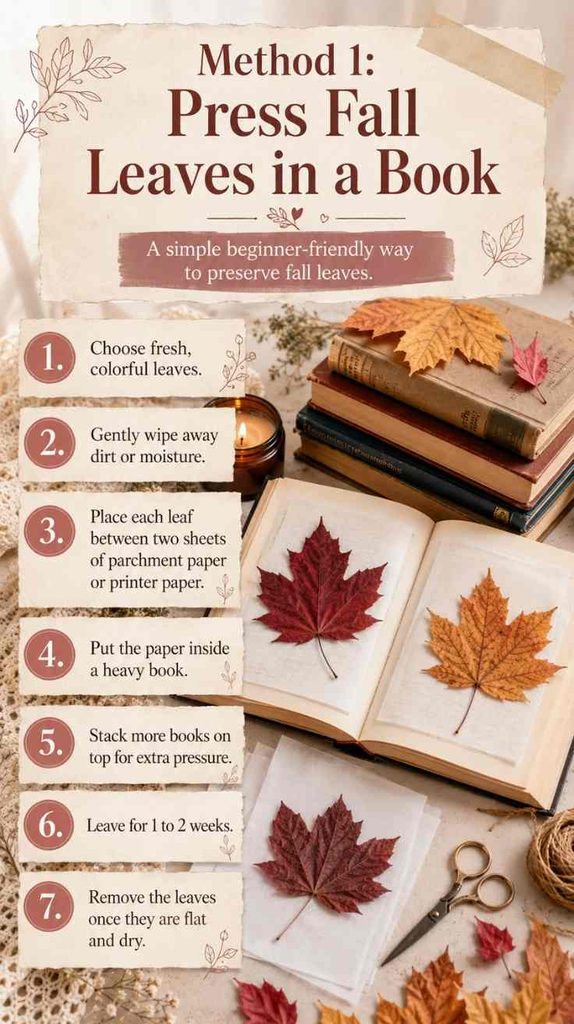
This is the easiest method and probably the best one for beginners. It takes a little longer, but it gives you flat, natural-looking pressed leaves for crafts.
You will need:
Heavy book, parchment paper or printer paper, fall leaves, extra books for weight.
Steps:
- Choose fresh, colorful leaves that are not wet or crunchy.
- Gently wipe away dirt or moisture with a paper towel.
- Place each leaf between two sheets of parchment paper or printer paper.
- Put the paper inside a heavy book.
- Stack more books on top to add extra pressure.
- Leave the leaves pressed for 1 to 2 weeks.
- Carefully remove the leaves once they are flat and dry.
This method is perfect for pressed leaf bookmarks, scrapbook pages, fall cards, nature journals, and framed autumn wall art.
Method 2: Press Fall Leaves With an Iron
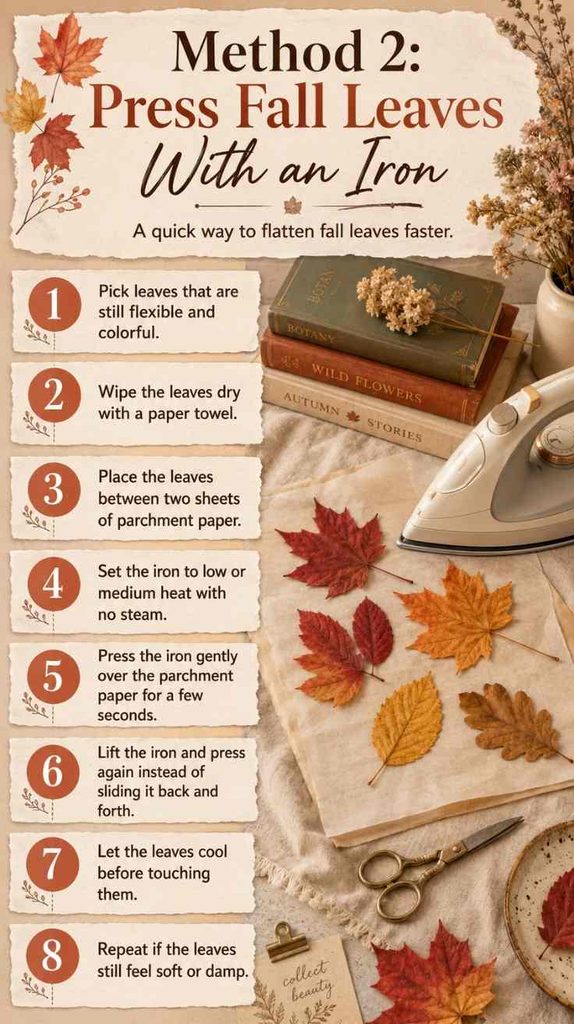
This method is great when you want faster results. It helps flatten the leaves quickly and removes moisture without waiting for weeks.
You will need:
Fall leaves, parchment paper, iron, flat heat-safe surface.
Steps:
- Pick leaves that are still flexible and colorful.
- Wipe the leaves dry with a paper towel.
- Place the leaves between two sheets of parchment paper.
- Set the iron to low or medium heat with no steam.
- Press the iron gently over the parchment paper for a few seconds.
- Lift the iron and press again instead of sliding it back and forth.
- Let the leaves cool before touching them.
- Repeat if the leaves still feel soft or damp.
This method works well for quick fall crafts, handmade cards, leaf garlands, and simple autumn decorations.
Method 3: Press Fall Leaves With Wax Paper
Wax paper is a classic method for preserving fall leaves. It gives the leaves a slightly sealed finish and works especially well for kids’ crafts, window decor, and simple fall projects.
You will need:
Fall leaves, wax paper, parchment paper or thin cloth, iron.
Steps:
- Choose leaves that are colorful, clean, and dry.
- Place the leaves between two pieces of wax paper.
- Cover the wax paper with parchment paper or a thin cloth.
- Set the iron to low or medium heat with no steam.
- Press gently for a few seconds at a time.
- Let the wax paper cool completely.
- Cut around the leaves if you want to use them for crafts.
This method is perfect for leaf window hangings, fall garlands, kids’ autumn crafts, and simple pressed leaf decorations.
Method 4: Press Fall Leaves in a Flower Press
A flower press gives you a cleaner and more even result. If you already make pressed flower crafts, pressed leaf bookmarks, or nature journal pages, this method is worth using.
You will need:
Flower press, absorbent paper, cardboard layers if needed, fall leaves.
Steps:
- Open the flower press and place a sheet of absorbent paper inside.
- Arrange the leaves in a single layer.
- Make sure the leaves are not overlapping.
- Cover the leaves with another sheet of absorbent paper.
- Tighten the flower press evenly.
- Leave the leaves inside for 1 to 2 weeks.
- Check that they are fully dry before using them.
This method is best for delicate leaf art, pressed leaf bookmarks, framed fall leaves, scrapbook pages, and resin crafts.
Method 5: Press Fall Leaves for Resin Crafts
If you want to use fall leaves in resin bookmarks, resin coasters, ornaments, trays, or keychains, the leaves need to be completely dry first. Any moisture can make the resin cloudy or cause the leaves to darken.
You will need:
Pressed fall leaves, clear sealer or Mod Podge, resin mold, resin, gloves, craft tools.
Steps:
- Press the leaves first using a book or flower press.
- Wait until the leaves are completely dry and flat.
- Gently seal both sides with clear spray sealer or Mod Podge.
- Let the sealed leaves dry fully.
- Place the leaves inside the resin mold.
- Pour resin slowly over the leaves.
- Remove bubbles carefully.
- Let the resin cure according to the product instructions.
This method is perfect for pressed leaf resin bookmarks, fall ornaments, autumn coasters, handmade gifts, and seasonal craft projects.
How to Keep Pressed Fall Leaves From Turning Brown
The biggest secret is choosing leaves at the right time. Fresh, colorful leaves preserve much better than old crunchy leaves.
Try these tips:
- Choose leaves that are still flexible.
- Do not press wet leaves.
- Dry the leaves completely before crafting.
- Keep finished crafts away from direct sunlight.
- Seal the leaves if you want them to last longer.
- Store extra pressed leaves between paper in a dry place.
Pressed leaves can fade over time, but these little steps help keep the color prettier for longer.
What to Make With Pressed Fall Leaves
Pressed fall leaves are perfect for cozy autumn crafts. You can use them in so many simple projects, especially if you want natural fall decor without spending much.
Here are a few pretty ideas:
- Pressed leaf bookmarks
- Fall leaf wall art
- Autumn greeting cards
- Scrapbook pages
- Memory journals
- DIY photo albums
- Resin ornaments
- Fall leaf garlands
- Thanksgiving place cards
- Framed pressed leaves
- Nature journal pages
- Handmade fall gift tags
- Candle jar decorations
- Pressed leaf coasters
- Autumn table decor
FAQ
What is the easiest way to press fall leaves?
The easiest way to press fall leaves is to place them between parchment paper or printer paper inside a heavy book. Add more books on top and leave them for 1 to 2 weeks.
How do you press fall leaves without losing color?
Choose fresh colorful leaves, press them before they become crunchy, and keep the finished leaves away from direct sunlight. You can also seal them with clear spray sealer or Mod Podge.
Can I press fall leaves with an iron?
Yes, you can press fall leaves with an iron. Place the leaves between parchment paper and press with a low or medium heat setting. Do not use steam.
Can I use wax paper to preserve fall leaves?
Yes, wax paper works well for simple fall leaf crafts. Place the leaves between wax paper, cover with parchment paper or cloth, and press gently with a warm iron.
How long do pressed fall leaves last?
Pressed fall leaves can last for months or even years if they are completely dry, stored properly, and kept away from sunlight and humidity.
Can pressed fall leaves be used in resin?
Yes, pressed fall leaves can be used in resin, but they must be fully dry first. It is also best to seal them before adding resin so they do not darken too much.
Some links in this post may be affiliate links, which means I may earn a small commission at no extra cost to you.